|
<< Click to Display Table of Contents >> Dialog overview |
  
|
|
<< Click to Display Table of Contents >> Dialog overview |
  
|
In PVsyst, there are several ways to select the objects of the shadings scene. A more complex selection can be made using the advanced selection dialog.
The advanced selection dialog can be opened from the shadings scene by clicking on the menu Tools -> List and management of objects.
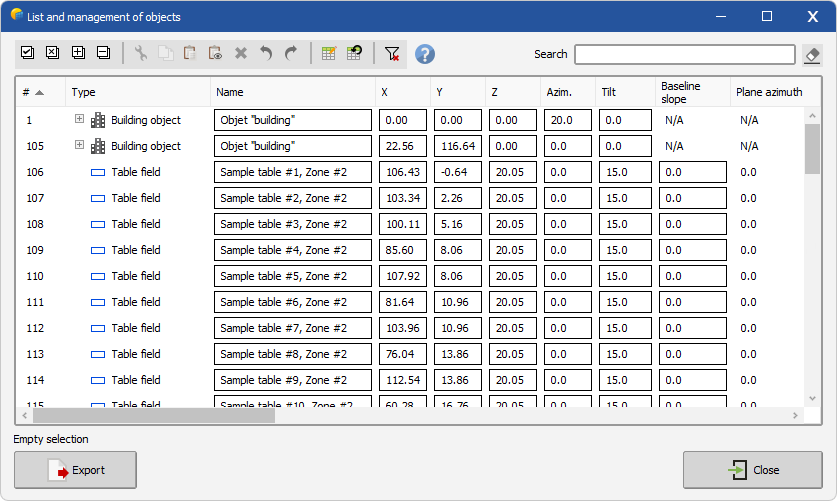
In this dialog it is possible to search, filter, sort, select, edit and remove objects of the shadings scene. It is also possible to export in CSV format.
In order to search specific objects from your shadings scene, you can enter a specific text in the Search box:
![]()
The search is applied on the #, Type and Name columns. To clear the search, clear the content of the search box or left click on ![]() .
.
Each column can be filtered and sorted.
To filter a column, hover the mouse cursor over the desired column header and left click on the funnel that appears:
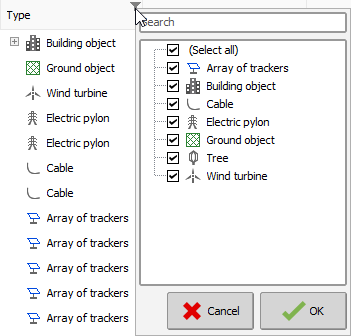
You can now filter the items you want in the pop-up window.
Note that it is possible to filter several columns at the same time.
To clear the filtering, left click on ![]() .
.
To sort a column, just left click on the desired column header. This will sort the column in ascending or descending order, and a sort symbol will appear on the column:
![]()
![]()
![]() : Select all displayed objects.
: Select all displayed objects.
![]() : Unselect all objects.
: Unselect all objects.
You can also select / unselect the objects directly in the list, by left clicking on the objects while holding the CTRL key down.
When you close the advanced selection dialog, the selected objects will remain selected in the shadings scene.
![]() : Expand all objects.
: Expand all objects.
![]() : Collapse all objects.
: Collapse all objects.
![]() : Copy all selected objects to clipboard.
: Copy all selected objects to clipboard.
![]() : Paste from clipboard to selected objects. If no object is selected, the paste will be performed on objects with the same ID (#).
: Paste from clipboard to selected objects. If no object is selected, the paste will be performed on objects with the same ID (#).
![]() : Same as standard paste, but only applied to visible columns.
: Same as standard paste, but only applied to visible columns.
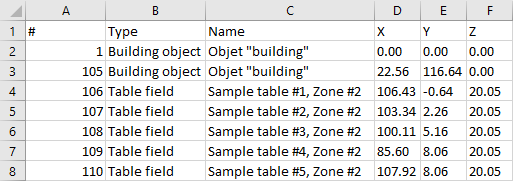
Pasting can also be done from an external spreadsheet program like Excel. In this case, be sure to copy the title line and have at least the 3 first columns #, Type and Name:
![]() : Opens the edition dialog for the selected object. A single object can also be edited by double clicking on it.
: Opens the edition dialog for the selected object. A single object can also be edited by double clicking on it.
![]() : Delete the selected objects.
: Delete the selected objects.
![]() : Undo.
: Undo.
![]() : Redo.
: Redo.
Some fields are also editable, these are cells surrounded by a rectangle:
![]()
If several objects are selected, the edition will be applied in a grouped way to all the selected objects.
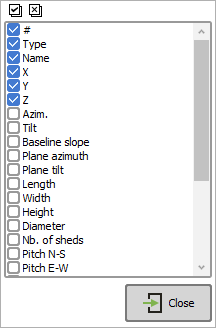
In order to gain in readability, it is possible to show / hide the columns:
![]() : Select / Unselect columns to show. Also available by right clicking on the columns header. Note that your choice is saved for the next sessions.
: Select / Unselect columns to show. Also available by right clicking on the columns header. Note that your choice is saved for the next sessions.
![]() : Show default columns.
: Show default columns.
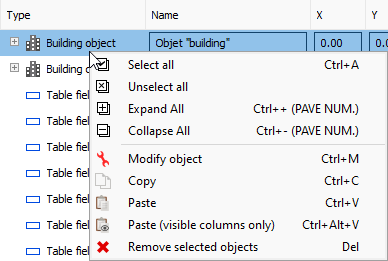
Some actions are accessible via a contextual menu by right-clicking on selected tree node(s):
In order to use the data linked to the objects outside PVsyst, it is possible to export the displayed list in CSV format.
Click on ![]() , then paste (CTRL + V) in Excel or any other spreadsheet program.
, then paste (CTRL + V) in Excel or any other spreadsheet program.